Decoration of Interiors. My client's ideal loft. 2010
Mixed Media.
This project has been my favorite up to now. Each of us had to pick a client, ask them all sorts of questions that would help us understand what their ideal loft would look like, we had to create the floor plan and finally make a 3D model of it.
We were free to create anything we wanted, but with some conditions that we all had to follow: The loft had to have a second story, half of the size of the ground floor from where we could see part of the ground floor and to the outside area, and the opposite wall from the entrance had to be a 6 meter tall piece of glass. The loft was situated on the 5th floor of an 8 story building.
Front view

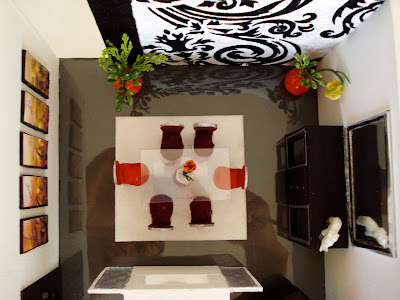
Top view

I picked one of my best friends as my client because i knew she would come up with some crazy ideas for her "ideal" loft and make it more challenging and interesting for me.
She wanted her loft to be very opened and bright, also she wanted the bedroom in the ground floor so that the second floor would only be a huge walking closet, and the best part was that she wanted a jacuzzi in the living room!! Of course she had no problems about privacy so i pretty much had to work with it.
The materials i used were mostly fabric, clay, cardboard, cardboard paper, all other kinds of texturized papers, glue, wire and beads. I went to several fabric stores to get samples of fabric that i loved and used them as carpets and upholstery and created every piece on my own.
I divided the big 6 meter tall piece of glass into 6 different parts with beams and columns for support and for aesthetic reasons. I used opaque glass from the middle to the highest part for privacy issues, and from the middle to the ground i put translucent glass, which was separated in sliding and fixed doors.
East view

The ground floor consisted of an opened kitchen with a bar, a dining and living area, a small bathroom for guests, a bedroom with a small laundry area beneath the stair cases, and a jacuzzi in between the bedroom and the living room. I separated the living area from the bedroom with an organza wall, which provides some privacy but still allows the light to go through (because it is still a little translucent). The flooring was laminated wood for the entire loft, except the bedroom and the first floor which had carpet instead to make it more comfortable. Obviously the jacuzzi is something a little private so i tried to balance privacy with my client's wishes, and finally decided to place it in between the bedroom and living room with entrances from both sides.
Bedroom

Bedroom view from outside

Entrance and dining area
Kitchen, bar and dining area

The first floor consisted of a big bathroom with a big mirror, separated from the walking closet with a glass sliding door, and a small entertainment and massaging area. Its a very opened and bright area due to the several big mirrors and opened space from the main area downstairs.
West view

Walking closet, massaging area and entrance to bathroom

Thank you Vale for your awesome ideas! Te quiero!