March 25, 2011

36) texturized picture frames!


Ideas. Texturized picture frames. Summer 2009
Mixed media on wood.
Once i had learnt lots of new techniques, i was trying to create things that were both useful (picture frame) and beautiful for an interior. This first one i made while i was in IDEAS with the help of my teacher, and while doing it i learnt some other few techniques with cardboard, molds and sand. The technique with sand was one of my favorite once because of the beautiful and natural texture it gives. For all of these pieces i used acrylics and oil paint (each of them with their specific mediums).
I learnt also how to paint wood textures with acrylics, oils and different brush sizes. I painted this wood texture at the back of my first picture frame.

The second and third picture frames were made at home during my free time. I loved the first one so much that i wanted to do as many as i could so it would help me practice and also so i would have beautiful things to sell (because all of my aunts loved the first one so much they all wanted one for their house lol)
Ever since i went back to Vancouver to after the summer i had been wanting to continue doing these kind of things that i learnt during summer, but i couldn't find the wood i was always using in Peru which meant that i had to create my own picture frame first, and i couldn't seem to find time to get the correct material and to get myself to do it, but one day i'll do more of those :)


35) Texture techniques

I stopped going to the painting classes in the institute of Peruano - Japones because it was way too far from my house and i had to go every other day without a car, so i started checking for other places near my house and i found IDEAS.
IDEAS is a contemporary store where you can get materials, paintings, and all sorts of things for interiors that had been beautifully decorated, such as cup holders, picture frames, trays, cups, plant pots, etc. And apart from that, they offered different kinds of classes to be able to decorate our interiors using techniques that i had never seen before.
I took classes twice a week for almost 2 months.


Texture techniques. Ideas. Summer 2009.
Mixed media on board.

I made this piece thinking of it as a practice board because all i did was use an empty space on the board to learn a new technique. The teacher would teach me a technique and i would apply it to my board without even thinking that it could end up being a nice piece of art.
I learnt crazy ways of creating different textures like using crumpled plastic bags (to create the texture in the yellow background), or sponge molds to crate image stamps with molding paste (the gray image in the center), using a special rubber comb to create the gray wavy texture with molding paste at the left, or even using bleach to create those random round dots painted in red.

Also, i learnt how to use oil paint properly. My entire life, ever since i started painting, i was always using acrylics and for once i tried oil paint and the effect that the oil paint gives in wood surfaces is much nicer than acrylics i think, specially since it lasts longer for it to dry, there's more opportunities to create more textures and transparencies.
That metal looking effect that i gave to the stamp in the middle and to the wave image was very simple. first i painted the entire surface with black acrylics and once the paint was dry, i put a layer of silver acrylic paint on top. A very important thing to have with you when making this decorations is a piece of cloth. Right after i put the silver layer on my surface i would gently wipe off the paint from the relief of the stamp so that the background would be darker, making the stamp stand out even more.
Im not sure if i explained that very well but the point is that it create a lovely effect if you ever want something to look like metal.


34) Textures

Textures. Peruano - Japones. Summer 2009
Mixed media on wood.

I started using different materials such as rope and styrofoam and learnt new techniques to create nice textures with crumpled paper.
This is not exactly one of my favorite pieces, in fact i think i gave it away because i did not like it, but i want to put it here because it was sort of useful and i did learn some new things.

33) Picture Frame (From Canada to Peru)

After my first year in Vancouver, i went back to Peru to spend time with my family during summer, but since i pretty much do nothing other than relaxing when i'm there, i decided to take some painting courses just for the sake of learning and doing what i like most.

I realized that paintings in Peru are usually different that those in North America, not only because of the style they use but also because of the different materials that are available. I personally LOVE peruvian artists, i don't exactly know of anyone in particular, but simply
walking in the streets and seeing the amazing things people come up with is just unbelievable. It always makes me think how, having so much talent, opening a small store is as far as they can get, while many others without that talent are much better off. I find it very unfair sometimes, but i guess that's how life works.

I wanted to learn the techniques these artists in Peru use so bad that i signed up to a painting course in the institute "Peruano-Japones" in June 2009.


Picture Frame. Peruano - Japones. Summer 2009
Acrylics on wood.

We learnt how to create nice textures on wood using a sponge, molding paste, hard fabric and styrofoam. For example, I created the little leafs using molding paste and a palette knife and added some basic texture on the surface of the frame using the molding paste and the sponge. It's amazing how simple creative things can end up looking pretty good.
Every part of this picture frame has texture, either with the fabric or with the molding paste, but there's no single smooth area other than the center which is where the picture goes.


32) Model

Drawing class. Watercolor. 2009
Watercolor on paper.

In our drawing class we learnt how to use all kinds of pencil, pastel, ink, as well as watercolors. And even though watercolor and pastel are not my favorite for drawing, i found it amazing how amazing drawings watercolors can create and in a very short time. Some people say that watercolor is painting, but i remember our teacher always saying that using watercolor was a way of drawing, and i believe that too.
Different models would come to our class once in a while so we could draw them. And these are some examples.


31) Me (Ink)

During my second semester in UBC i took several courses, and as i mentioned before, apart from my painting course i was also taking drawing and digital arts, at the same time. In my painting class i learnt so much about different materials and techniques of painting that have honestly helped me so much with my later projects, and even though i can say that i enjoyed the painting class a bit more, i did so many thing in drawing that were new to me, for instance how to use ink and how to create 5 minutes nice drawings with watercolors, ink and pencil.

Drawing Class. Ink. 2009
Black and brown ink on paper.

Out of the many self portraits i had to do in my time in UBC, this is probably one of my favorite ones. We were learning how to use ink with pen and brush to be able to create from nice simple drawings to complicated and well blended compositions. I drew this portrait out of a photograph i took long time ago, and i decided to use the ink combining both the brush and the pen (pen for the sharper areas suck as edges and my hair, and the brush for smoother areas such as shadows.)
I worked a lot with black and brown ink, but i made this piece using only black.


I made several ink drawings, but i specially liked my self-portrait and this drawing of my hands and feet. I made this drawing with brown and black ink.


March 24, 2011

30) Commodity of Art


Painting. Commodity of Art.2009
Acrylic, acrylic mediums and other on canvas.

My final piece for the course was about the commodity of art. We were supposed to create a contemporary piece representing an issue about contemporary art, using the mediums and the new techniques we learnt in the course.
I chose to create a piece that would represent what i thought of most contemporary art at the moment, how, nowadays, artists make art not just for the sake of art making and expressing ideas and emotion but more for the money they would make out of it.

This first picture was a rough draft of what my final piece was gonna look like. I decided to depict my idea by adding bills, coins, information about art commodity and money symbols into it. I always liked addict objects and texturized mediums to my pieces because they give my painting a rough looking finish.

The fact that my piece was pretty abstract already tell that it is a modern piece, but in order to make it look even more contemporary, i decided to use different sized canvases and put them all together as a single piece. The overall size was pretty big, i forgot what exactly but probably about 1.2 x 1.2 meters.

This piece has lots of small details that you can only really notice looking at it in person, but these are some parts that were zoomed in. As you can see, i added coins and pieces of paper that were half folded so the viewer could have some interaction with the piece, because i like my art not only to be looked at but also to be touched.

I brought my painting in pieces all the way to Peru, i framed it and hung it in my parent's living room. ;)

29) Family Portrait


Family portrait. Acrylic mediums and image transfers. 2009
Acrylic, acrylic mediums and ink on board.

By this point, we were learning all about acrylic mediums, their properties and how we can use them to make our paintings look better.

"Acrylic medium is basically the same as acrylic paint without the pigment. We can use it as paint additive, an adhesive, and a texturizer, and it can also be used to create image transfers. It comes in three basic weights (medium, gel, and paste) and two finishes (matter and gloss)."

I loved the idea of the image transfers and i started testing it on my own during my free time. There are several ways of transferring an image using acrylic medium, and after trying several of them i found that the one i feel more comfortable with was using the matte medium.

Basically what i had to do was print the image that i wanted to transfer in a normal paper and using a brush, i added the matte medium on the top of the picture, waited for it to dry and added another layer. I did this process about 3 times until there was enough medium on the picture. After i was sure that the medium was all dry, i put the picture in water for a couple of minutes so that the paper would get soft and be easy to remove. Right after taking the picture off the water, i started removing the paper from the back by gently rubbing my fingers on the surface in circular motion. What it does is that the ink gets stuck in the medium, so that when i removed the paper from the back i had a piece of transparent medium with the portrait of my family, which i afterwards pasted on the canvas. This is very useful because not only it looks more artistic, but also we can paint and add colors to the image ourselves without worrying that it might tear or that it might loose its color.


When i started working on this piece, i had no idea that it was going to turn out to be something nice that i would once hang on my wall because the reason why i did it was just for practice and experimenting. I really wanted to try the image transfer and i had also recently bought lots of textured mediums that i wanted to try and see what they were used for. So while i was simply experimenting i realized that what i had done was pretty cool, so i took it with me to Peru, framed it, and now its hangs on my parent's house wall. (I love it)
The writing at the top is a lovely poem for my family that i found at the time and i just loved it, so even thought it's written horizontally, and many people might get neck problems trying to read it, the meaning is still there and i think it look more artistic and creative.

28) Ice cube

Painting. Shadows and lights. 2009
Acrylic on board

When painting, an object look real when it has been given a proper use of shadows and lights. I forgot exactly what the assignment was for this piece, but i remember choosing an ice cube because, due to its transparency, the use of light and shadows is even more essential to make it look real.
I'm not a big fan of this painting because my aim was to make it look photo-realistic, and even though it doesn't look bad, it wasn't what i wanted it to be.

March 16, 2011

27) Colors

I haven't updated my blog in almost a year and all the things that i did in 2008 and 2009 seem so far behind that i really hope i can remember what each of my pieces was about so i can at least have something to write.

Painting. Colors. 2009
Acrylic on cardboard and paper

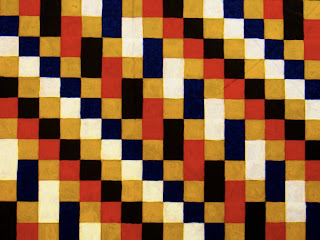
We attempted to create optical illusions by using composition of colors and patterns.


We played around with colors and painted using primaries, secondaries and complementary colors. I liked this exercise a lot because i realized that in painting there really is no right or wrong, the choice of colors simply makes things look more or less realistic, but painting isn't always about depicting reality. If we use only primary or secondary colors on their own, we will never get a very realistic image, however we can still recognize what the painting is about.
In this case, the two pears below were painted using primary and secondary colors only, and even though the first two look more natural and real, i can still recognize that they are pears and they look much more interesting due to their surreal appeal.